让libTorrent优先选择教育网IPv6地址

猫在教育网机子上挂PT, 但是机子同时是内网的IPv6网关(HE的/64), 结果rtorrent每次返回给tracker的&ipv6=后面总是我在HE的2001:470:xx:xx::1, 和教育网PT上其他用户之间连接效果差爆了.

在折腾了几种workaround无效后, 最后不得不改libtorrent的代码了! 由于ipv6部分本身就是由一个patch加上去的, 我只需要对这个patch再patch一次即可:
安装过程就不再赘述了, 满网上都是的…

--- A/libtorrent-0.12.6-ipv6-07.patch	2011-08-19 00:02:03.603735921 +0800
+++ B/libtorrent-0.12.6-ipv6-07.patch	2011-08-19 00:36:14.824983083 +0800
@@ -417,7 +417,7 @@
 diff -Nur libtorrent-0.12.6.orig/src/net/local_addr.cc libtorrent-0.12.6/src/net/local_addr.cc
 --- libtorrent-0.12.6.orig/src/net/local_addr.cc	1970-01-01 01:00:00.000000000 +0100
 +++ libtorrent-0.12.6/src/net/local_addr.cc	2010-07-23 14:44:51.000000000 +0200
-@@ -0,0 +1,336 @@
+@@ -0,0 +1,340 @@
 +// libTorrent - BitTorrent library
 +// Copyright (C) 2005-2007, Jari Sundell
 +//
@@ -502,29 +502,33 @@
 +#ifdef RAK_USE_INET6
 +// IPv6 priority, from highest to lowest:
 +//
-+//  1. Global address (2000::/16 not in 6to4 or Teredo)
-+//  2. 6to4 (2002::/16)
-+//  3. Teredo (2001::/32)
-+//  4. Empty/INADDR_ANY (::)
-+//  5. Everything else (link-local, ULA, etc.)
++//  1. cernet & cernet2 address (2001:250::/32 and 2001:da8::/32)
++//  2. Other global address (2000::/16 not in 6to4 or Teredo)
++//  3. 6to4 (2002::/16)
++//  4. Teredo (2001::/32)
++//  5. Empty/INADDR_ANY (::)
++//  6. Everything else (link-local, ULA, etc.)
 +int get_priority_ipv6(const in6_addr& addr) {
 +  const uint32_t *addr32 = reinterpret_cast(addr.s6_addr);
 +  if (addr32[0] == htonl(0) &&
 +      addr32[1] == htonl(0) &&
 +      addr32[2] == htonl(0) &&
 +      addr32[3] == htonl(0)) {
-+    return 4;
++    return 5;
 +  }
 +  if (addr32[0] == htonl(0x20010000)) {
-+    return 3;
++    return 4;
 +  }
 +  if ((addr32[0] & htonl(0xffff0000)) == htonl(0x20020000)) {
-+    return 2;
++    return 3;
 +  }
-+  if ((addr32[0] & htonl(0xe0000000)) == htonl(0x20000000)) {
++  if (addr32[0] == htonl(0x20010250) || addr32[0] == htonl(0x20010da8)) {
 +    return 1;
 +  }
-+  return 5;
++  if ((addr32[0] & htonl(0xe0000000)) == htonl(0x20000000)) {
++    return 2;
++  }
++  return 6;
 +}
 +#endif
 +
[多图]Windows 平台 OpenVPN (IPv4/IPv6) 简明使用教程

1, 如果是IPv4用户, 可以到官网(http://openvpn.net/)下载安装最新版OpenVPN, 并跳过下面的 5 – 6 步

如果是IPv6用户, 可以到官网下载2.1.1版本(http://openvpn.net/release/openvpn-2.1.1-install.exe)的OpenVPN(IPv6补丁最高支持到2.1.1版本的OpenVPN)
然后到github(https://github.com/downloads/jjo/openvpn-ipv6/openvpn.exe-2.1.1-ipv6-0.4.11.zip)下载IPv6补丁.

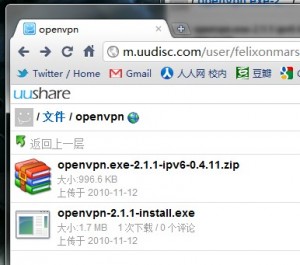
2, 如果无法访问上述地址(如教育网用户), 可以访问http://m.uudisc.com/user/felixonmars/files/3671029下载OpenVPN 2.1.1及其IPv6补丁包.

3, Win7 用户下载后不要直接打开, 需要使用管理员权限运行.

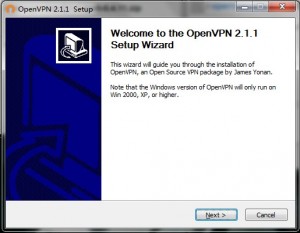
4, 按照提示安装 OpenVPN 客户端软件

Continue reading [多图]Windows 平台 OpenVPN (IPv4/IPv6) 简明使用教程

继续我的Ubuntu之旅 (3)

恩,在开头先提醒各位小白鼠: ppa:network-manager/ppa 和 ppa:xorg-edgers/ppa 是两门毒药, 慎装!!
(因为它们的杯具, Felix 重装系统了 =.=||)
这段时间小纠结了一下路由表/服务器方面的问题, 下面是一部分最近的笔记
照例先给个目录:
1, Ubuntu 10.04 Server 短按电源键热关机:
2, Xorg版本过新导致nvidia驱动不加载的workaround
3, HUST/Tsinghua/SJTU的 6in4 tunnel 开启方法
4, 三种HUST能使用的Linux下的锐捷认证工具(mystar/xrgsu/mentohust)
5, 更通用的路由表脚本

1, Ubuntu 10.04 Server 短按电源键热关机:
Ubuntu 10.04 Server 默认没有安装acpid, 先装上:

sudo apt-get install acpid

然后编辑 /etc/acpi/events/powerbtn:

sudo vi /etc/acpi/events/powerbtn

找到下面这行:

action=/etc/acpi/powerbtn.sh

修改为:

action=/sbin/poweroff

然后重启,就大功告成啦:)
参考: http://linux.chinaunix.net/bbs/thread-1113446-1-1.html

Continue reading 继续我的Ubuntu之旅 (3)

开启 Teredo 通道, 提前感受 IPv6 (for 非教育网用户)

当初Win7刚要出来时,Felix对其“DirectAccess”功能感到十分向往,从网上找到资料,发现这只是 Teredo 的一个应用。在其他平台上,也一样可以轻易开启 Teredo 从而访问 IPv6 资源。

×××希望各位公网用户不要再使用高校的isatap通道打开ipv6了,教育网的ipv6带宽很有限,而教育网的ipv4却不能出国,因此教育网ipv6是高校学生们获取我朝以外资源最实惠的途径了!×××

Windows XP(SP1+):

netsh interface ipv6 install
netsh interface ipv6 set teredo client

Windows Vista/7:

netsh int ter set state client

Debian/Ubuntu Linux:

sudo apt-get install miredo

Redhat/Fedora Linux:

su -c 'yum install miredo'
su -c 'service miredo-client start'
Continue reading 开启 Teredo 通道, 提前感受 IPv6 (for 非教育网用户)

释放教育网的潜能! 教育网开启IPv6完全教程

IPv6不是一个传说, 它确实地存在于这个神奇的国度. —题记

首先介绍基本的 IPv6 协议安装方法, 以及实现常用接入方法的语句:

对于Windows XP用户:

安装ipv6的语句:

netsh int ipv6 install

对于Windows XP/2003/Vista/7用户:

禁用6to4:

netsh int ipv6 6to4 set state disabled

设置IPv6 DNS服务器:

netsh int ipv6 add dns "本地连接" <dns服务器地址></dns服务器地址>

双栈/原生IPv6接入:
无需特别设置
ISATAP隧道设置:

netsh interface ipv6 isatap set state disabled
netsh interface ipv6 isatap set router <isatap隧道服务器地址>
netsh interface ipv6 isatap set state enabled

固定IP设置:

netsh interface ipv6 add address "本地连接" <固定IP地址>;
netsh interface ipv6 add route ::/0 "本地连接" <网关地址> publish=yes

Tunnel Broker设置:
访问注册账户,记下获得的ipv6地址,并启用(enable)通道
然后在本机:

ipv6 ifcr v6v4 <本机IPv4地址> 
ipv6 adu 5/<获得的IPv6地址>
ipv6 rtu 2000::/3 5

其中:数字5是在执行“ipv6 ifcr v6v4 <本机IPv4地址> ” 时,系统生成的接口 index编号。
注意:Windows XP重启后上述配置参数不会保存,所以用户需要重新配置。

对于Linux用户:

ISATAP隧道设置(Ubuntu/Debian):

sudo apt-get install isatapd
sudo isatapd -r <isatap隧道服务器地址>

Tunnel Broker设置:

iptunnel add sit1 mode sit remote  local <本机IPv4地址> ttl 30 //sit1是属于tunnel的那个接口,可随便设,但不能用sit0
ifconfig sit1 up
ifconfig sit1 inet6 add <获得的IPv6地址>/128
route -A inet6 add 2000::/3 sit1
echo 1 > /proc/sys/net/ipv6/conf/all/forwarding
Continue reading 释放教育网的潜能! 教育网开启IPv6完全教程
QR Code Business Card